
Công ty TNHH Máy móc thực phẩm cầu nối Á-Âu Tô Châu


Khối sô cô la là một trong những loại sôcôla đơn giản và phổ biến nhất. Việc sản xuất khối sô cô la đòi hỏi thiết bị chế biến nguyên liệu sô cô la và thiết bị đúc. Đầu tiên làm tan mỡ rắn trong bể nấu chảy, đổ đường cát vào máy xay đường và đập dập để sử dụng. Sau đó chuyển mỡ lỏng sang máy trộn bằng máy bơm, bột cacao được lấy thủ công cho vào máy trộn khuấy đều. Trong máy trộn còn cần các nguyên liệu khác của sô cô la như sữa bột, bột whey,… Khối hỗn hợp được vận chuyển đến conche thông qua máy bơm để nghiền. Trong conche, khối sô cô la được nghiền thông qua việc trộn và khuấy để đạt được hiệu quả đồng nhất, nhũ hóa và khử mùi. Sau 10-12 giờ, sô cô la được nghiền xuống dưới 25 micron. Máy bơm chuyển khối đất từ conche sang bể chứa cho bước đúc và sản xuất tiếp theo. Nếu là sôcôla thật thì cần có máy ủ để điều chỉnh nhiệt độ. Khối sô cô la được chuyển từ thùng chứa sang máy ủ bằng máy bơm, và khối sô cô la đã được tôi luyện được chuyển đến máy đúc bằng áp suất để tạo hình.

Sôcôla nhân là một trong nhiều loại sôcôla. Hương vị bánh sandwich khác nhau sẽ mang lại trải nghiệm khác nhau cho người tiêu dùng. Bằng cách thay đổi hương vị, bạn có thể tăng sự đa dạng của sô cô la. Đầu tiên làm tan mỡ rắn trong bể nấu chảy, đổ đường cát vào máy xay đường và đập dập để sử dụng. Sau đó chuyển bơ lỏng vào conche bằng máy bơm. Theo công thức, bột cacao, đường bột, sữa bột, bột whey,… được thêm vào bánh conche theo trình tự. Nói chung, nhân sô cô la và sô cô la có công thức chế biến khác nhau, đòi hỏi hai chiếc bánh ốc quế riêng biệt để xay. Trong conche, khối sô cô la được nghiền thông qua việc trộn và khuấy để đạt được hiệu quả đồng nhất, nhũ hóa và khử mùi. Sau 10-12 giờ, sô cô la được nghiền xuống dưới 25 micron. Nhân sô cô la và sô cô la lần lượt được vận chuyển đến thùng chứa tương ứng để bảo quản chuẩn bị cho bước đúc tiếp theo. Nếu sô cô la là sô cô la thật thì cần có máy ủ để điều chỉnh nhiệt độ. Khối sô cô la được vận chuyển từ thùng chứa đến máy ủ bằng máy bơm, và khối sô cô la đã ủ được vận chuyển đến máy đúc bằng áp suất để tạo hình. Sô cô la béo thông thường có thể được sản xuất bằng dây chuyền đúc một lần.

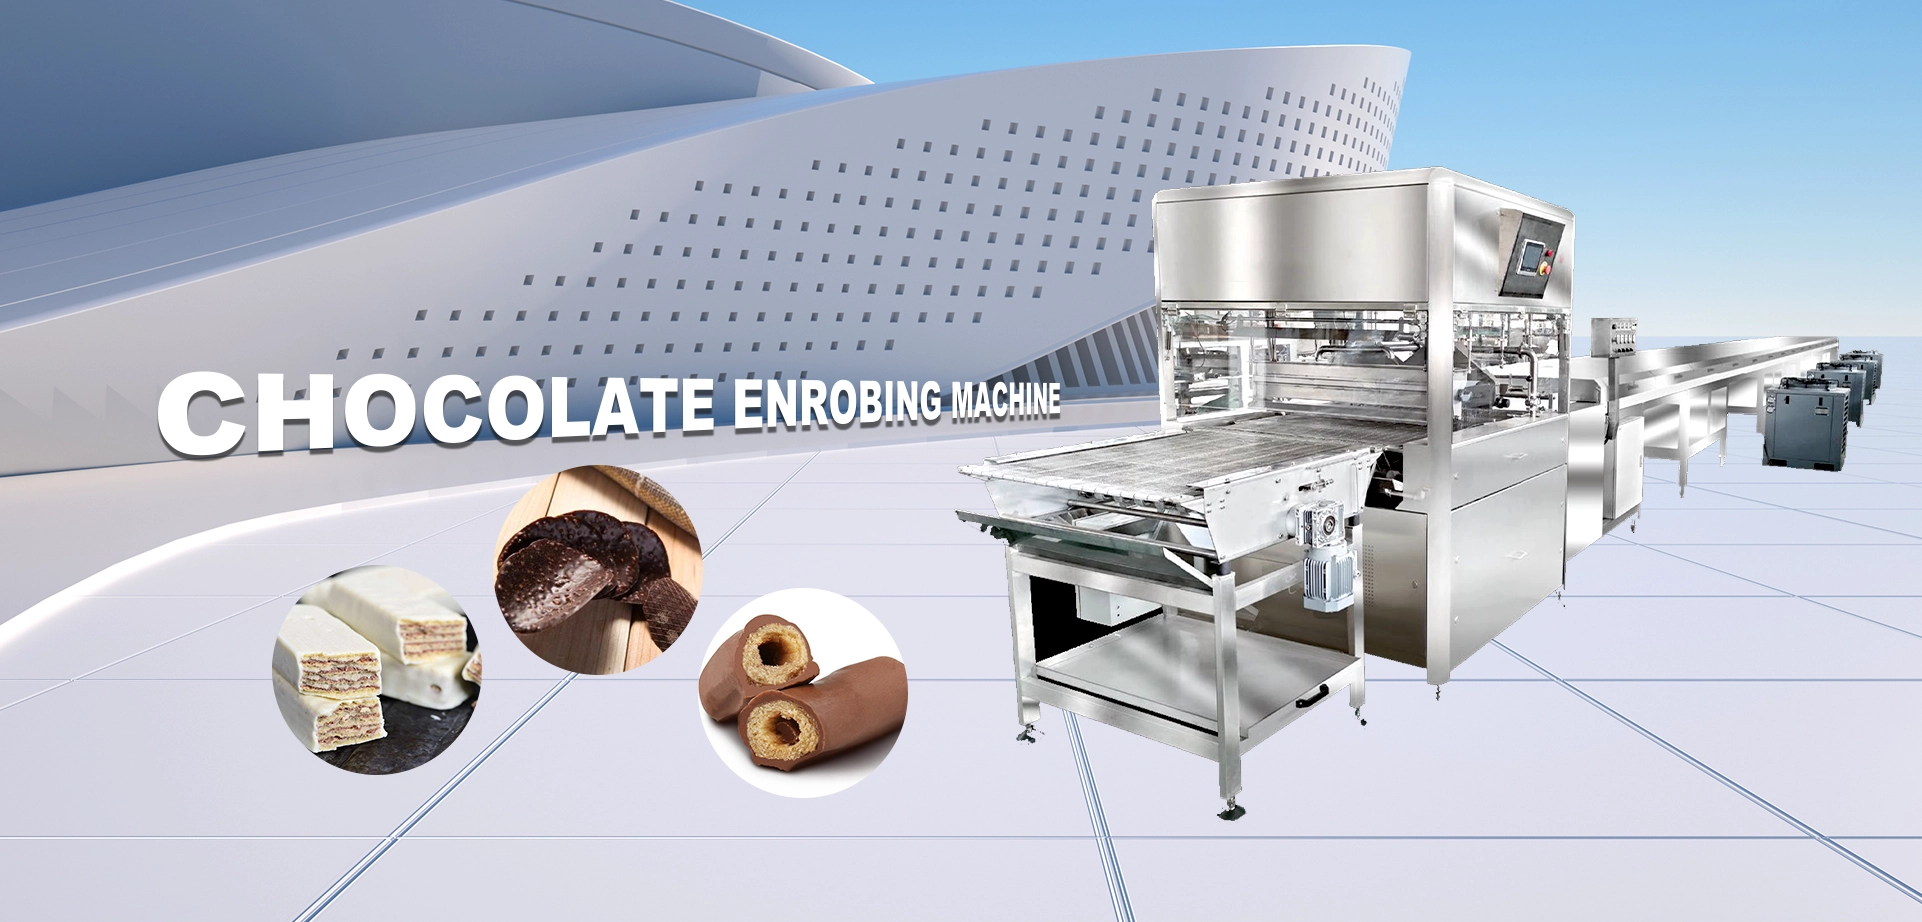
Dây chuyền sản xuất sô cô la bọc là lớp phủ sô cô la trên bề mặt bánh xốp, bánh quy, trứng ốp la, bánh sữa trứng, thực phẩm căng phồng, v.v. để tăng hương vị và giá trị của chính sản phẩm. Đầu tiên, khối sô cô la được nghiền bằng conche, sau đó khối sô cô la được vận chuyển đến bể chứa thông qua máy bơm để cách nhiệt. Sau đó, khối sô cô la chuyển sang phễu máy phủ để lưu trữ qua máy bơm. Khối sô cô la được vận chuyển đến bể chứa ở phần trên của enrober bằng bơm bên trong máy phủ để phun.

Sôcôla đậu phộng là một trong những sản phẩm sôcôla được ưa chuộng trong những năm gần đây. Sử dụng công thức và thiết bị đơn giản. Đậu phộng sô cô la sau khi phủ sô cô la, cân bằng, tạo màu và đánh bóng. Đầu tiên làm sô cô la khối bằng máy conche sau khi nghiền chuyển sang thùng chứa sô cô la. Nếu khách hàng không có ý định tự mình sản xuất sô cô la sền sệt thì cũng có thể chọn mua sô cô la bán thành phẩm, đun chảy sô cô la chuyển vào bể chứa để sử dụng. Đậu phộng được đổ vào máy đánh bóng, đổ vào hoặc phun vào khối sô-cô-la thông qua hệ thống bùn, đòi hỏi phải thay thế gió nóng và gió lạnh liên tục trong quá trình phủ. Quấn khối sô cô la lên bề mặt đậu phộng. Sau khi sơn xong cần tĩnh điện trong 24h sau đó đổ vào máy đánh bóng để tiến hành đánh bóng màu và dầu làm sáng.